“Simple Schedule Notice” is a WordPress plugin enabling you to send reminder mails daily, monthly, or yearly. It is simple and easy to use, and does what you want.
Contents :
Server Requirements
Installation
General Settings and Information Page >>
Notification Settings Page >>
Download >>
Server Requirements
The plugin uses “wp_mail” function to send mails. If your server is not equipped with SMTP server, install WP-Mail-SMTP plugin which enables you to send mails via your external SMTP server.
Installation
The installation procedure is as follows.
- Log in to the site, and open Dashboard page.
- Open “Plugins > Installed Plugins”, and click “Upload” button.
- Upload the plugin zip file.
- Activate it.
- When activated, “Schedule Notice” is in “Tools” menu.
General Settings and Information Page
When you click “Tools > Schedule Notification” on the administration page, the “Simple Schedule Notification” management page will be displayed.
General Settings
Set data common to the plugin here.
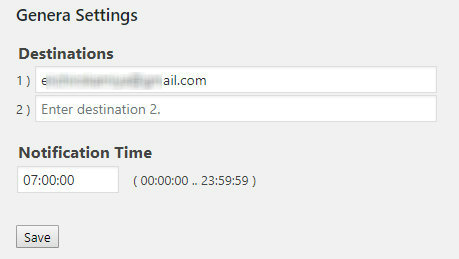
Data items are as follows.
| Destination | Common mail addresses where notifications are sent. Up to two destinations can be specified. Each notification entry can further specify destinations in the detail page. |
| Notification Time | The time when a normal action wakes up to check if notifications to be processed are found. |
Click “Save” button to save the settings.
Notification List
Registered notifications are listed here.
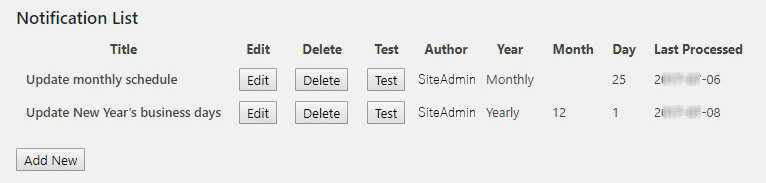
Functions of the buttons in this section are as follows.
| Edit | Moves to Detail Settings page to edit this notification. |
| Delete | Deletes this notification. |
| Test | A mail of this notification is sent to the destinations. “Test :” is added to the title. Last Processed Date is not updated. |
| Add New | Moves to Detail Settings page for a new notification. |
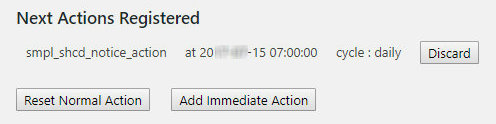
Next Action Registered
An action is a task which checks if there are notifications to be processed.
Following actions are prepared in this plugin.
- a) smpl_shcd_notice_action_immediate
- wakes up immediately (with one minute delay time), only once.
- b) smpl_shcd_notice_action (normal action)
- wakes up every day at the time specified in General Settings section.
- c) smpl_shcd_notice_action_test
- wakes up immediately (with one minute delay time), only once, and processes all notifications with “Test :” added to the title; Last Processed Date of each notification is not updated.
Functions of the buttons in this section are as follows.
| Discard | Discard this action. |
| Set Normal Action | Registers normal action. This button appears when there is not a normal action. |
| Reset Normal Action | Discards existing normal action and registers it again. This button appears when a normal action is already there. |
Note :
On a typical server, the action actually wakes up at the first access to the site after the specified time. Therefore, on a site not so frequently accessed, the recommendation is that you register a task on your local PC which accesses the site to kick actions at the specified time every day.
System Information
System information is displayed here.
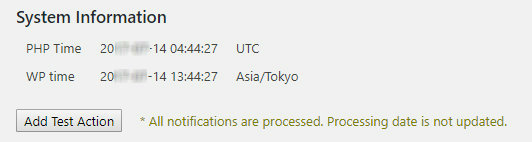
PHP time is the time known to the server. Usually you do not have to be conscious of this time.
WP time is the time known to WordPress. Use this time to set “Notification Time” in General Settings section.
Functions of the buttons in this section are as follows.
| Add Test Action | Registers action “smpl_shcd_notice_action_test”. This action wakes up immediately (with one minute delay time), processes all notifications regardless of the day specified. The mails sent will have “Test :” appended to the title. Processed date will not be updated. |
Notification Settings Page
When you click “Add New” or “Edit” button in the notification list, “Notification Settings” page is displayed.
Title
Enter title of this notification. which is also used as mail title.

Notification Cycle
Select the cycle to be processed, and enter the date to be processed.
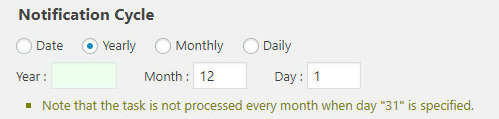
Notification cycle acts as follows.
| Date | Enter Year, Month and Day. Notification is made on the specified day. It remains in the list even after notification is processed. |
| Yearly | Enter Month and Day. Notification is made every year on the specified day of the month. |
| Monthly | Enter Day. Notification is made every month on the specified day. Note that specifying day “31” causes the notification not processed every month. |
| Daily | Notification is made every day. |
Common Destinations
You can suppress sending this notification mail to destination 1 or 2 specified in General Settings section by checking boxes.

Additional Destination
Up to two additional destinations can be specified here for this notification.

Text
Enter text to be sent here.
Last Processed Date
Last Processed Date can be cleared by checking the “clear” box so that this notification is sent on the next applicable day.

Buttons
Click appropriate button to finish works done on this page.
![]()
Functions of the buttons are as follows.
| Cancel | Discards any input and returns to Settings Page. |
| Add | Adds this new notification. Displayed when “Add New” opened this page. |
| Update | Updates this notification. Displayed when “Edit” opened this page. |
Download
Visit WordPress official plugin page.